網頁

2020年5月28日 星期四

Joystick of MicroBit and Raspberry PI, Part 2

MicroBit 之 JavaScript
bluetooth.onUartDataReceived(serial.delimiters(Delimiters.Hash), function () {
    basic.showString(bluetooth.uartReadUntil(serial.delimiters(Delimiters.Hash)))
})
bluetooth.onBluetoothDisconnected(function () {
    bCnt = 0
    basic.showLeds(`
        # . . . #
        . # . # .
        . . # . .
        . # . # .
        # . . . #
        `)
})
bluetooth.onBluetoothConnected(function () {
    bCnt = 1
    basic.showLeds(`
        . . . . .
        . . . . #
        . . . # .
        # . # . .
        . # . . .
        `)
})
let bCnt = 0
bCnt = 0
pins.setPull(DigitalPin.P5, PinPullMode.PullUp)
pins.setPull(DigitalPin.P11, PinPullMode.PullUp)
pins.setPull(DigitalPin.P15, PinPullMode.PullUp)
pins.setPull(DigitalPin.P14, PinPullMode.PullUp)
pins.setPull(DigitalPin.P13, PinPullMode.PullUp)
pins.setPull(DigitalPin.P12, PinPullMode.PullUp)
bluetooth.startUartService()
basic.showString("b")
basic.forever(function () {
    if (bCnt == 1) {
        bluetooth.uartWriteString("A" + pins.digitalReadPin(DigitalPin.P5) + pins.digitalReadPin(DigitalPin.P11) + pins.digitalReadPin(DigitalPin.P15) + pins.digitalReadPin(DigitalPin.P14) + pins.digitalReadPin(DigitalPin.P13) + pins.digitalReadPin(DigitalPin.P12) + "B" + pins.digitalReadPin(DigitalPin.P8) + "C" + pins.analogReadPin(AnalogPin.P1) + "D" + pins.analogReadPin(AnalogPin.P2))
        bluetooth.uartWriteString("E" + input.acceleration(Dimension.X) + "F" + input.acceleration(Dimension.Y) + "G" + input.acceleration(Dimension.Z) + "H" + input.acceleration(Dimension.Strength) + "I" + input.temperature())
    }
    basic.pause(1)
})

樹莓派上的 python
from bluezero import microbit
from bluezero import async_tools

def uart_callback(rt):
    #print(rt)
    pass
    
def ping():
    ubit.uart = 'ping#'
    return True

def goodbye():
    ubit.quit_async()
    ubit.disconnect()
    return False

ubit = microbit.Microbit(adapter_addr='DC:A6:32:9D:C9:74',
    device_addr='EA:40:D8:89:24:66', # tipet
    #device_addr='FF:06:9C:77:46:E9', # gaviv
    accelerometer_service=False,
    button_service=False,
    led_service=False,
    magnetometer_service=False,
    pin_service=False,
    temperature_service=False,
    uart_service=True)
eloop = async_tools.EventLoop()

ubit.connect()

ubit.subscribe_uart(uart_callback)
eloop.add_timer(10000, ping)
eloop.add_timer(30000, goodbye)

ubit.run_async()


Joystick of MicroBit and Raspberry PI

將 MicroBit 的搖桿透過藍芽連上樹莓派
參考 Waveshare 之 Joystick

到 https://makecode.microbit.org/ 編寫程式 切換 JavaScript 可以直接貼上
bluetooth.onBluetoothConnected(function () {
    basic.showString("C")
})
bluetooth.onBluetoothDisconnected(function () {
    basic.showString("D")
})
pins.setPull(DigitalPin.P5, PinPullMode.PullUp)
pins.setPull(DigitalPin.P11, PinPullMode.PullUp)
pins.setPull(DigitalPin.P15, PinPullMode.PullUp)
pins.setPull(DigitalPin.P14, PinPullMode.PullUp)
pins.setPull(DigitalPin.P13, PinPullMode.PullUp)
pins.setPull(DigitalPin.P12, PinPullMode.PullUp)
basic.showLeds(`
    # . . # #
    # . . # #
    # # # . .
    # . # . .
    # # # . .
    `)
bluetooth.startAccelerometerService()
bluetooth.startLEDService()
bluetooth.startIOPinService()
bluetooth.startTemperatureService()

右上齒輪/Project Settings
選擇 JustWorks pairing(default): Pairing is automatic once the pairing is initiated.
下載至 MicroBit

同時按下 AB 兩按鈕,再按下背面的 Reset 並放開 Reset
等待 畫面顯示完成,放開 AB 兩按鈕
在樹莓派右下角藍芽圖示,按滑鼠右鍵
選擇 Add Device
選擇 MicroBit, 按 Pair

參考 https://github.com/jaglees/pibit
參考 python-bluezero
參考 https://github.com/ukBaz/python-bluezero

$ bluetoothctl
[bluetooth]# show
Controller 5C:87:9C:1D:A8:7F (public)
Name: nano-desktop
Alias: nano-desktop
Class: 0x00000000
Powered: yes
Discoverable: no
Pairable: yes
UUID: Generic Attribute Profile (00001801-0000-1000-8000-00805f9b34fb)
UUID: PnP Information           (00001200-0000-1000-8000-00805f9b34fb)
UUID: Generic Access Profile    (00001800-0000-1000-8000-00805f9b34fb)
Modalias: usb:v1D6Bp0246d0530
Discovering: no
取得 adapter 的 MAC Address
[bluetooth]# power off
[bluetooth]# agent off
[bluetooth]# scan off
[bluetooth]# power on
[bluetooth]# agent on
[bluetooth]# scan on
取得 MicroBit 的 MAC Address
[bluetooth]# connect EA:40:D8:89:24:66
[bluetooth]# pair EA:40:D8:89:24:66
若是一直不成功,試試 remove, 再去 connect
[bluetooth]# remove EA:40:D8:89:24:66


將 MicroBit 的 MAC Address 填入 microbits.cnf
修改 python 程式中的 adapter

import time
from bluezero import microbit
from keyboardRead import NonBlockingConsole

# Set the address of the Pi Bluetooth controler
adapter='DC:A6:32:9D:C9:74'

devices={}
filepath = './microbits.cnf'
print ("Initialising microbits found in ", filepath)
try: 

    # Read list of Microbit MAC addresses and attempt to connect to each
    with open(filepath) as fp:
        line = fp.readline()
        while line:
            key=line.strip()
            print ("..Device: [",key.strip(),"]")
            try:
                # Define microbit object
                print ("....Initialising")
                devices[key] = microbit.Microbit(adapter_addr=adapter,
                                    device_addr=key,
                                    accelerometer_service=True,
                                    button_service=False,
                                    led_service=True,
                                    magnetometer_service=False,
                                    pin_service=True,
                                    temperature_service=True)
                print ("....Initialised")

                # Connect to microbit
                print ("....Connecting")
                devices[key].connect()
                print ("....Connected")
                devices[key].set_pin(5, True, False)
                devices[key].set_pin(11, True, False)
                devices[key].set_pin(15, True, False)
                devices[key].set_pin(14, True, False)
                devices[key].set_pin(13, True, False)
                devices[key].set_pin(12, True, False)
                devices[key].set_pin(1, True, True)
                devices[key].set_pin(2, True, True)
                devices[key].set_pin(8, True, False)
            except Exception as e:
                # If initilisation or connection failed remove this device from device list
                print(e)
                print ("....Initialisation or Connection failed")
                devices.pop(key, None)

            line=fp.readline()
except:
    print("Failed to open config file")
    exit()

# Check that at least one device is connected to - if not exit
if (devices is None or len(devices)==0):
    print ("No connected devices - exiting")
    exit()

# Loop whilst listening for keyboard input (on the Pi)
with NonBlockingConsole() as nbc:
    looping = True
    while looping:

        # Check each device in turn - getting the unique key of each device
        for dKey in devices:
            
            # If the escape key is pressed on the PI then break
            keyboardVal = nbc.get_data()
            if keyboardVal == '\x1b':  # x1b is ESC
                print ("Raspberry Pi Escape key pressed")
                looping=False
            elif keyboardVal == 'm':  
                msg = input("Enter message to output to all Pis:")
                for d in devices:
                    devices[d].text=msg


            # If the A button is pressed - exit the loop (a kill switch)
            #if (devices[dKey].button_a > 0):
            #    print("Device [", dKey, "] Button A Pressed" )
            #    #looping=False
            
            # Print the temperature from the device 
            print('Temperature [', dKey, '] = ', devices[dKey].temperature)
            print('Accelerometer [', dKey, '] = ', devices[dKey].accelerometer)
            #print("Device [", dKey, "] Button A = " , devices[dKey].button_a)
            #print("Device [", dKey, "] Button B = " , devices[dKey].button_b)
            print("Device [", dKey, "] Pin = " , devices[dKey].pin_values)
        
        time.sleep(1)


# Tidy up by disconnecting from all devices
print ("Disconnecting from all devices")
for dKey in devices:
    print ("..Device [",dKey,"]")
    print ("....Disconnecting")
    devices[key].disconnect()
    print ("....Disconnected")

Waveshare 之 Joystick

NamePINFunction
APin5Button A
BPin11Button B
CPin15Button C
DPin14Button D
EPin13Button E
FPin12Button F
XPin1Joystick X
YPin2Joystick Y
PPin8Joystick Press
BuzzerPin0Buzzer

2020年5月27日 星期三

Connect Raspberry PI and Wii

以下以適用 Jetson Nano

搖桿, Gamepad, Joysticks
參考 Wiimote Controller Configuration for Raspberry Pi 2/3
參考 How to Connect Wiimotes to the Raspberry Pi
參考 wminput.list
參考 action_enum.txt
參考 pd-l2ork cwiid

$ cat mywminput
# Classic-Controller
#Classic.Dpad.X = ABS_X
#Classic.Dpad.Y = ABS_Y
#Classic.LStick.X = ABS_HAT0X
#Classic.LStick.Y = ABS_HAT0Y
#Classic.RStick.X = ABS_HAT1X
#Classic.RStick.Y = ABS_HAT1Y
Classic.A = BTN_A
Classic.B = BTN_B
Classic.X = BTN_X
Classic.Y = BTN_Y
Classic.Minus = BTN_SELECT
Classic.Plus  = BTN_START
Classic.Home  = BTN_MODE
Classic.L  = BTN_TL
Classic.R  = BTN_TR
Classic.ZL = BTN_TL2
Classic.ZR = BTN_TR2

# WiiMote
Wiimote.A = BTN_A
Wiimote.B  = BTN_B
Wiimote.Dpad.X = ABS_HAT0X
Wiimote.Dpad.Y = -ABS_HAT0Y
Wiimote.Minus = BTN_SELECT
Wiimote.Plus = BTN_START
Wiimote.Home = BTN_MODE
Wiimote.1 = BTN_X
Wiimote.2 = BTN_Y

# Nunchuk
Nunchuk.C = BTN_C
Nunchuk.Z = BTN_Z
Nunchuk.Stick.X = ABS_RX
Nunchuk.Stick.Y = -ABS_RY

Plugin.led.Led1 = 1
#Plugin.led.Led2 = 1
#Plugin.led.Led3 = 1
#Plugin.led.Led4 = 1

Plugin.ir_ptr.X = ABS_HAT1X
Plugin.ir_ptr.Y = ABS_HAT1Y

Plugin.acc.X = ABS_X
Plugin.acc.Y = ABS_Y
#Plugin.acc.Z = ABS_Z


$ cat connectwii.sh

#!/bin/bash
sleep 1 # Wait until Bluetooth services are fully initialized
hcitool dev | grep hci >/dev/null
if test $? -eq 0 ; then
    wminput -d -c  /home/pi/mywminput 00:1A:E9:EB:07:2A &
else
    echo "Blue-tooth adapter not present!"
    exit 1
fi

同時按下1,2 並放開
$ sudo ./connectwiimote.sh
$ sudo apt-get install jstest-gtk
$ jstest-gtk
$ ps -efa | grep wminput
$ sudo kill -9 pid


使用 python 控制
參考 Raspberry Pi 4 bluetooth scale
參考 wiiweigh
參考 xwiimote

export PYTHONPATH=/usr/lib/python2.7/site-packages
sudo visudo
Defaults env_keep += "PYTHONPATH"
加入上一行

同時按下1,2 並放開
$ bluetoothctl
[bluetooth]# connect 00:1A:E9:EB:07:2A
[bluetooth]# exit
$ xwiishow list
Listing connected Wii Remote devices:
  Found device #1: /sys/devices/platform/soc/fe201000.serial/tty/ttyAMA0/hci0/hci0:12/0005:057E:0306.0004
End of device list
$ xwiishow 1
$ bluetoothctl
[bluetooth]# disconnect 00:1A:E9:EB:07:2A
[bluetooth]# exit
$ cd src/xwiimote-bindings/examples/python
$ sudo python xwiimote_test.py

可以加入下列程式
        elif evt.type == xwiimote.EVENT_NUNCHUK_KEY:
            code, state = evt.get_key()
            print "Nunchuk Key:", code, ", State:", state
        elif evt.type == xwiimote.EVENT_NUNCHUK_MOVE:
            x, y, z = evt.get_abs(0)
            #print "Nunchuk controller move 1:", x, y
        elif evt.type == xwiimote.EVENT_ACCEL:
            x, y, z = evt.get_abs(0)
            #print "Accelerometer move 1:", x, y, z


Wii Balance Board
參考 chaosbiber / wiiweigh
參考 Raspberry Pi Smart Scale
參考 Disassembling Wii Balance Board
參考 Wii Balance Board Smart Scale ( w/ ESP32 )

HX711接腳
青-E+
綠-E-
紅-A-
白-A+

雙黑 開關
LED 白P 青N

2020年5月21日 星期四

Install JetPack 4.4

https://developer.nvidia.com/embedded/jetpack

$ sudo apt update
$ sudo apt-get install python

選擇 Download the NVIDIA SDK Manager
$ sudo dpkg -i sdkmanager_1.1.0-6343_amd64.deb
$ sdkmanager
此時會檢查記憶體空間和螢幕解析度
硬碟要求也越來越大

輸入 NVIDIA DEVELOPER 帳號密碼
在 Step 01, 選 Target Hardware: Jetson AGX Xavier
CONTINUE TO STEP 02
勾選 I accept the terms and conditions of the license agreements
CONTINUE TO STEP 03
輸入 root 密碼
連接 Xavier 40-Pin 邊的 usb, 到安裝主機的 usb
會使用此連線(192.168.55.1)到被安裝主機
選擇 Automatic setup 或 Manual setup
Automatic 是要在已經安裝過,可以 login 的機器
輸入 IP, Username, Password
Finish
Manual 可以用在未安裝的機器
Force Recover button
Power button
同時放開

輸入 IP, Username, Password
切換到被安裝主機繼續設定
選擇鍵盤,時區,主機名稱,使用者名稱,密碼

jetson_clocks.sh 已經改成 jetson_clocks

sudo apt-get install python3-pip
sudo pip3 install jetson-stats
sudo vi /etc/rc.local
#!/bin/bash
sleep 10
sudo sh -c 'echo 100 > /sys/devices/pwm-fan/target_pwm'
sudo chmod u+x /etc/rc.local

安裝中文
System Settings/Language Support
sudo apt-get install ibus-chewing
reboot
System Settings/Text Entry
+ Chinese (Chewing)(IBus)
Switch to next source using: Ctrl+Space

sudo apt-get install x11vnc
sudo x11vnc -storepasswd
sudo chmod 644 ~/.vnc/passwd

設定預設聲音輸出
sudo vi /etc/pulse/default.pa
最底部
#set-default-sink output
set-default-sink 0
#set-default-sink input

設定 menu & title bar 大小
/usr/bin/gsettings set com.ubuntu.user-interface scale-factor "{'HDMI-0': 16}"

設定 滑鼠游標 大小
gsettings set org.gnome.desktop.interface cursor-size 48

自動執行
收尋/Startup Applications

git 中文

解決 windows 中,中文亂碼問題
> git config --global gui.encoding utf-8
> git config --global i18n.commitencoding utf-8

>git remote add origin http://ip:port/username/project.git
>git push -u origin master
remote: User permission denied
fatal: unable to access 'http://ip:port/username/project.git/': The requested URL returned error: 403

修改 .git/config
[remote "origin"]
url = http://username@ip:port/username/project.git

>git push -u origin master

2020年5月18日 星期一

備份

顯示硬碟掛載狀況
# df -h

分割硬碟,若硬碟超過2TB, 就無法使用 fdisk, 改用 parted
# fdisk -l
# fdisk -l /dev/sda
parted 似乎比較好用

格式化
# mkfs.ext4 /dev/sda1

若格式化出現
warn: had trouble writing out superblocks
# mkfs.ext4 -S /dev/sda1

掛載硬碟
# mkdir /mnt/backup
# mount /dev/sda1 /mnt/backup

檢查及修復檔案系統
# esfsck -a /dev/sda1

備份
# rsync -av /mnt/source /mnt/destination
備份 頻寬限制 1000KB/s
# rsync -av --bwlimit=1000 /mnt/source /mnt/destination

Arduino MEGA 2560 + RAMPS 1.4 + LCD 12864

X-EN D38 PD7(T0)
X-STEP A0 PF0(ADC0)
X-DIR A1 PF1(ADC1)


Y-EN A2 PF2(ADC2)
Y-STEP A6 PF6(ADC6)
Y-DIR A7 PF7(ADC7)


Z-EN A8 PK0(ADC8/PCINT16)
Z-STEP D46 PL3(OC5A)
Z-DIR D48 PL1(ICP5)


E0-EN D24 PA2(AD2)
E0-STEP D26 PA4(AD4)
E0-DIR D28 PA6(AD6)


RepRapDiscount Full Graphic Smart Controller


ASR M08-A 語音辨識

返回值 255 去除敏感字
返回值 254 口令

準備  zhun bei
夥計 huo ji
開燈 kai deng
關燈 guan deng
燈 deng
左轉 zuo zhuan
右轉 you zhuan
轉 zhuan
前進 qian jin
停 ting後退 hou tui
播放音樂 bo fang yin yue
零 ling
一 yi
二 er
三 san
四 si
五 wu
六 liu
七 qi
八 ba
九 jiu
零 lan
一 it
二 ji
三 san
四 si
五 wu
六 lio
七 tshit
八 bat
九 kau

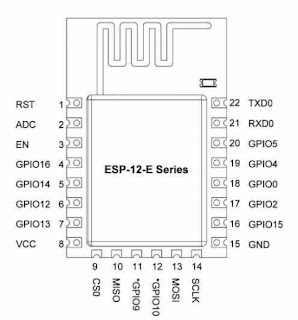
WF8266

WF8266T-TFT
  • GPIO0 : UPDATE(紅色按鍵), DHT11(DATA) / DHT22(DATA)
  • GPIO1 : Tx
  • GPIO2 : None
  • GPIO3 : Rx
  • GPIO4 : SD Card CS
  • GPIO5 : D/C
  • GPIO12: MISO
  • GPIO13: MOSI
  • GPIO14: SCK
  • GPIO15: CS
  • GPIO16: LED
  • ADC : None

常用韌體
  • AT Command
  • Web SDK

Baudrate 115200

WF8266T 更新韌體
1 GPIO0 接地後開機
2 按著紅色鍵(UPDATE),再按白色(RESET)鍵一次後,放開紅色鍵

BUILTIN_LED GPIO2

WF8266R 更新韌體
1 按著白色鍵 5 秒 藍色LED慢閃 重新開機
2 接腳 RST 接地 重新開機
3 白色鍵按著 並且 重新開機 進入燒寫模式
4 按著白色鍵 10 秒 藍色 LED 快閃 重置

BUILTIN_LED GPIO12

AT Command
Baudrate 115200
選擇 NL&CR

AT+CIFSR: 顯示 IP 和 MAC
AT+CIPSTA=<IP>: 設定 IP,IP 要加引號

AT+CWMODE?: 查詢當前模式
AT+CWMODE=1: 設定為 Station 模式
AT+CWMODE=2: 設定為 AP 模式
AT+CWMODE=3: 設定為 Station+AP 模式

AT+CWLAP: 查詢可連線的Wifi網路清單,需在 Station 模式
AT+CWJAP?: 查詢目前連線的網路
AT+CWJAP=<SSID>,<Password>: 連線到網路,SSID 與 Password 要加引號
AT+CWQAP: 切斷連線

AT+CIPMUX=0: 關閉多重連線,此時無法進入伺服器模式
AT+CIPMUX=1: 開啟多重連線模式
AT+CIPMUX?: 查詢目前模式

AT+CIPSERVER=<mode>,<port>: 開啟或關閉伺服器
mode: 0關閉,1開啟

AT+CIPSTART=?: 查詢目前已經建立的連線
AT+CIPSTART=<type>,<addr>,<port>: 連線網路,適用於 CIPMUX=0
AT+CIPSTART=<id>,<type>,<addr>,<port>: 連線網路,適用於 CIPMUX=1
id: 0-4
type: "TCP" or "UDP"
addr: IP 位址,要加引號

AT+CIPSEND=<length>: 傳送訊息,適用於 CIPMUX=0
AT+CIPSEND=<id>,<length> 傳送訊息,適用於 CIPMUX=1
length: 訊息長度。此命令發送後,等 > 符號出現,再輸入訊息

AT+CIPCLOSE: 中斷連線,適用於 CIPMUX=0
AT+CIPCLOSE=<id>: 中斷連線,適用於 CIPMUX=1

Web SDK
  1. 第一次使用 WF8266R 會進入 AP 模式
  2. 利用電腦查詢可用無線網路,會看到 UNU-WF8266R-xxxx 的 AP
  3. 設定使用自動取得 IP,連入上述網路,預設沒有密碼
  4. 使用瀏覽器連入 http://192.168.4.1
  5. 填入 WF8266R 要使用哪一台 AP 上網
  6. 此時 WF8266R 會重開機,並且連入上述網路
  7. 再次利用瀏覽器連入 http://192.168.4.1
  8. 此時可以看到 WF8266R 的設定,包含 IP如 192.168.1.20
  9. 重新設定電腦連線,與 WF8266R 同一 AP
  10. 再次利用瀏覽器連入 http://192.168.1.20
http://192.168.1.20/ap/on 打開 AP
http://192.168.1.20/ap/off 關閉 AP


測試 SD Card 速度

釋放Linux記憶體
# echo 1 > /proc/sys/vm/drop_caches
釋放dentries、inodes所用的 cache memory。
# echo 2 > /proc/sys/vm/drop_caches
釋放pagecache、dentry、inode 所用的 cache memory。
# echo 3 > /proc/sys/vm/drop_caches
完全釋放cache memory,必須先執行sync,避免錯誤。
# sync

Write speed
# sync; time dd if=/dev/zero of=~/test.tmp bs=500K count=1024
Read speed
# sync; echo 3 | sudo tee /proc/sys/vm/drop_caches
# sync; time dd if=~/test.tmp of=/dev/null bs=500K count=1024

SanDisk microSDHC 32GB Extreme U3 90MB/s
Arduino 寫速度測試
root@arduino:/mnt/sda1# sync; time dd if=/dev/zero of=test.tmp bs=500K count=1024
1024+0 records in
1024+0 records out
real    2m 25.16s
user    0m 0.04s
sys     0m 20.11s
Arduino 讀速度測試
root@arduino:/mnt/sda1# sync; echo 3|tee /proc/sys/vm/drop_caches
3
root@arduino:/mnt/sda1# sync; time dd if=test.tmp of=/dev/null bs=500k count=1024
1024+0 records in
1024+0 records out
real    0m 30.68s
user    0m 0.00s
sys     0m 8.86s
root@arduino:/mnt/sda1# uname -a
Linux arduino 3.3.8 #1 Thu Jun 2 12:28:33 CEST 2016 mips GNU/Linux
root@arduino:/mnt/sda1#
Arduino 拍照測試(不下載)
root@arduino:/# time gphoto2 --port usb:001,003 --capture-image
New file is in location /capt0000.jpg on the camera
real    0m 4.92s
user    0m 1.74s
sys     0m 0.36s
Arduino 拍照測試,下載到 Flash
root@arduino:/# time gphoto2 --port usb:001,003 --capture-image-and-download --no-keep
New file is in location /capt0000.jpg on the camera
Saving file as capt0000.jpg
Deleting file /capt0000.jpg on the camera
Deleting 'capt0000.jpg' from folder '/'...
real    0m 22.88s
user    0m 1.23s
sys     0m 8.77s
root@arduino:/#
Arduino 拍照測試,下載到 SD Card
root@arduino:/mnt/sda1# time gphoto2 --port usb:001,003 --capture-image-and-down
load --no-keep
New file is in location /capt0000.jpg on the camera
Saving file as capt0000.jpg
Deleting file /capt0000.jpg on the camera
Deleting 'capt0000.jpg' from folder '/'...
real    0m 6.53s
user    0m 1.81s
sys     0m 0.58s
root@arduino:/mnt/sda1#
RaspberryPi 寫速度測試
pi@raspberrypi:~ $ sync; echo 3| sudo tee /proc/sys/vm/drop_caches
3
pi@raspberrypi:~ $ sync; time dd if=/dev/zero of=test.tmp bs=500k count=1024
1024+0 records in
1024+0 records out
524288000 bytes (524 MB) copied, 27.8328 s, 18.8 MB/s

real 0m27.847s
user 0m0.020s
sys 0m3.360s
RaspberryPi 讀速度測試
pi@raspberrypi:~ $ sync; echo 3| sudo tee /proc/sys/vm/drop_caches
3
pi@raspberrypi:~ $ sync; time dd if=test.tmp of=/dev/null bs=500k count=1024
1024+0 records in
1024+0 records out
524288000 bytes (524 MB) copied, 22.8695 s, 22.9 MB/s

real 0m22.877s
user 0m0.050s
sys 0m1.340s
pi@raspberrypi:~ $ 
RaspberryPi 拍照測試(不下載)
pi@raspberrypi:~ $ time gphoto2 --port usb:001,004 --capture-image
New file is in location /capt0000.jpg on the camera                            

real 0m3.011s
user 0m0.150s
sys 0m0.100s
RaspberryPi 拍照測試(下載)
pi@raspberrypi:~ $ time gphoto2 --port usb:001,004 --capture-image-and-download --no-keep
New file is in location /capt0000.jpg on the camera                            
Saving file as capt0000.jpg
Deleting file /capt0000.jpg on the camera
Deleting 'capt0000.jpg' from folder '/'...

real 0m3.037s
user 0m0.140s
sys 0m0.140s
pi@raspberrypi:~ $ 


SanDisk ExtremePRO microSDHC UHS-I(V30) 32GB
Arduino 寫速度測試
root@arduino:/mnt/sda1# sync; time dd if=/dev/zero of=test.tmp bs=500K count=1024
1024+0 records in
1024+0 records out
real    2m 32.46s
user    0m 0.01s
sys     0m 20.18s
Arduino 讀速度測試
root@arduino:/mnt/sda1# sync; echo 3|tee /proc/sys/vm/drop_caches
3
root@arduino:/mnt/sda1# sync; time dd if=test.tmp of=/dev/null bs=500k count=1024
1024+0 records in
1024+0 records out
real    0m 30.80s
user    0m 0.00s
sys     0m 8.52s
root@arduino:/mnt/sda1#
Arduino 拍照測試(不下載)
root@arduino:/# time gphoto2 --port usb:001,003 --capture-image
New file is in location /capt0000.jpg on the camera
real    0m 4.92s
user    0m 1.74s
sys     0m 0.45s
Arduino 拍照測試,下載到 Flash
root@arduino:/# time gphoto2 --port usb:001,003 --capture-image-and-download --no-keep
New file is in location /capt0000.jpg on the camera
Saving file as capt0000.jpg
Deleting file /capt0000.jpg on the camera
Deleting 'capt0000.jpg' from folder '/'...
real    0m 22.96s
user    0m 1.19s
sys     0m 9.09s
root@arduino:/#
Arduino 拍照測試,下載到 SD Card
root@arduino:/mnt/sda1# time gphoto2 --port usb:001,003 --capture-image-and-download --no-keep
New file is in location /capt0000.jpg on the camera
Saving file as capt0000.jpg
Deleting file /capt0000.jpg on the camera
Deleting 'capt0000.jpg' from folder '/'...
real    0m 5.89s
user    0m 1.80s
sys     0m 0.45s
root@arduino:/mnt/sda1#


RaspberryPi 寫速度測試
pi@raspberrypi:~ $ sync; echo 3| sudo tee /proc/sys/vm/drop_caches
3
pi@raspberrypi:~ $ sync; time dd if=/dev/zero of=test.tmp bs=500k count=1024
1024+0 records in
1024+0 records out
524288000 bytes (524 MB) copied, 27.6452 s, 19.0 MB/s

real 0m27.657s
user 0m0.000s
sys 0m4.020s
RaspberryPi 讀速度測試
pi@raspberrypi:~ $ sync; echo 3| sudo tee /proc/sys/vm/drop_caches
3
pi@raspberrypi:~ $ sync; time dd if=test.tmp of=/dev/null bs=500k count=1024
1024+0 records in
1024+0 records out
524288000 bytes (524 MB) copied, 23.0098 s, 22.8 MB/s

real 0m23.020s
user 0m0.000s
sys 0m1.610s
pi@raspberrypi:~ $ 
RaspberryPi 拍照測試(不下載)
pi@raspberrypi:~ $ time gphoto2 --port usb:001,004 --capture-image
New file is in location /capt0000.jpg on the camera                          

real 0m3.053s
user 0m0.160s
sys 0m0.140s
RaspberryPi 拍照測試(下載)
pi@raspberrypi:~ $ time gphoto2 --port usb:001,004 --capture-image-and-download --no-keep
New file is in location /capt0000.jpg on the camera                          
Saving file as capt0000.jpg
Deleting file /capt0000.jpg on the camera
Deleting 'capt0000.jpg' from folder '/'...

real 0m2.994s
user 0m0.170s
sys 0m0.070s
pi@raspberrypi:~ $ 

2020年5月15日 星期五

Raspberry Pi 4 安裝

不要使用 NOBBS,直接下載 Raw Images 安裝
https://downloads.raspberrypi.org/raspbian_latest
下載 SD 卡寫入工具
http://sourceforge.net/projects/win32diskimager/

網路相關
參考 https://www.raspberrypi.com.tw/2152/setting-up-wifi-with-the-command-line/
$ iwconfig wlan0
$ sudo iwlist wlan0 scan
$ sudo ifdown wlan0
$ sudo ifup wlan0
$ sudo kill -9 $(ps -ef |grep wpa | awk '{print $2}')
$ sudo wpa_supplicant -B -i wlan0 -c /etc/wpa_supplicant/wpa_supplicant.conf
$sudo dhclient
/etc/dhcpcd.conf
/etc/wpa_supplicant/wap_supplicant.conf

network={
 ssid="foo"
 psk="yourpassword"
 proto=RSN
 key_mgmt=WPA-PSK
 pairwise=CCMP
 auth_alg=OPEN
}

/etc/wpa_supplicant/functions.sh
將 WPA_SUP_OPTIONS="$WPA_SUP_OPTI"ONS -D nl80211,wext
改成 WPA_SUP_OPTIONS="$WPA_SUP_OPTI"ONS -D wext,nl80211

工作列/滑鼠右鍵/Add/Remove Panel Items
選 Panel Applets/按 Add
選 CPU Temperature Monitor/按 Add
工作列出現 CPU 溫度顯示

工作列/時間/滑鼠右鍵/Digital Clock Settings
Clock Format: %Y/%m/%d %H:%M:%S

工具列/聲音/滑鼠右鍵
選擇 Analog | HDMI

1. 更新 /etc/apt/sources.list 底下的套件清單
$ sudo apt-get update
2. 比對套件清單決定是否更新,若有相依性問題則放棄
$ sudo apt-get upgrade
3. 處理新版本套件與相依性套件的衝突,並嘗試安裝/移除有問題的套件
$ sudo apt-get dist-upgrade
4. 刪除因相依性而安裝,但已經不使用的套件
$ sudo apt-get autoremove
5. 清除 /var/cache/apt/archives 的 .deb 套件檔
$ sudo apt-get autoclean
6. 更新核心和韌體到最新版(請備份ˇ)
$ sudo rpi-update

開始/Perferences/Raspberry Pi Configuration
點選 Interfaces
Enable SSH 和 VNC
重新開機
工具列/VNC/滑鼠右鍵/Options
Security/Authentication 選 VNC password
Users&Permissions/選 Standard user/按 Password
輸入 password
按OK
設定沒有接螢幕時的解析度
$ sudo raspi-config
7 Advanced Options
A5 Resolution
選擇預設的解析度
重新開機(會等很久,不要擔心)

$ sudo apt install xscreensaver
開始/Perferences/Screensaver 無法使用,改用下列命令
重新開機
$ xscreensaver-demo
Display Modes/Mode 選 Blank Screen Only

安裝SCIM輸入法
$ sudo apt-get install scim scim-tables-zh
安裝新酷音輸入法
$ sudo apt-get install scim-chewing
開始/Perferences/SCIM Input Method
FontEnd/Global Setup
按 Next input method 右邊的按鈕
按 ... 按鈕
按鍵盤左邊的 Shift
按 +
按 OK
IMEngine/Global Setup
取消簡體字和不需要的輸入法
按右下角的 箭頭按鈕
按 OK
開始/Perferences/Raspberry Pi Configuration
Localisation/Set Locale
Language: zh
Country: TW
Character Set: UTF-8
按 OK
重新開機

安裝 chromium 80
下載 https://packages.debian.org/buster/armhf/chromium/download
$ sudo apt remove chromium-browser
$ sudo apt install libminizip1 libre2-5 chromium-common
$ sudo apt install libjsoncpp1
$ sudo dpkg -i chromium_80.0.3987.149-1_deb10u1_armhf.deb
設定 chromium 的 title bar
Chrome menu/Settings
Appearance 取消勾選 Use system title bar and borders

更改滑鼠捲動方向
參考 How to invert mouse scroll in Raspbian?
$ xinput list
Virtual core pointer                    id=2 [master pointer  (3)]
  Virtual core XTEST pointer              id=4 [slave  pointer  (2)]
  Logitech K400                            id=6 [slave  pointer  (2)]
Virtual core keyboard                    id=3 [master keyboard (2)]
  Virtual core XTEST keyboard              id=5 [slave  keyboard (3)]
  Logitech K400                            id=7 [slave  keyboard (3)]
$ xinput list-props 6
$ xinput set-prop 6 "libinput Natural Scrolling Enabled" 1

2020年5月14日 星期四

git stash

狀況:時常於 dev_new_fun 時,發現 master 有 bug,而 dev_new_fun 又不能 commit

$ git stash
$ git stash list
$ git checkout master
修改 master
$ git commit
$ git checkout dev_new_fun
$ git rebase master
$ git stash pop

以下為錯誤方式
$ git stash
$ git stash list
$ git checkout master
修改 master
$ git commit
$ git checkout dev_new_fun
$ git rebase master
$ git stash pop
warning: Cannot merge binary files: file.c (Updated upstream vs. Stashed changes)
出現衝突
$ git reset --hard HEAD
回復 stash pop 的上一個動作


2020年5月4日 星期一

MicroBit 之開發

Micro:bit 使用 c 開發,可使用 線上開發 或 離線開發
但是 線上開發的版本沒有更新,導致新的板子無法使用
加速度和磁力計有兩種不同版本, MMA8653 和 LSM303
離線開發是使用 yotta

yotta 安裝方式
參考 yotta Documentation 和 Yotta
$ sudo apt-get update
$ sudo apt-get install python-setuptools cmake build-essential ninja-build python-dev libffi-dev libssl-dev
$ sudo easy_install pip
$ pip install yotta
$ sudo mkdir -p /usr/local/lib/yotta_modules
$ sudo chown $USER /usr/local/lib/yotta_modules
$ chmod 755 /usr/local/lib/yotta_modules
$ sudo apt-get remove binutils-arm-none-eabi gcc-arm-none-eabi
$ sudo add-apt-repository ppa:team-gcc-arm-embedded/ppa
$ sudo apt-get update
$ sudo apt-get install gcc-arm-embedded
$ sudo apt-get install clang-3.9
$ pip install --upgrade cryptography
$ sudo apt-get install srecord
$ git clone https://github.com/lancaster-university/microbit-samples

$ yt target bcc-microbit-classic-gcc
$ cd microbit-samples
$ cp source/examples/bluetooth-services/* source/
$ yt clean
$ yt build

資料產生於 build/bcc-microbit-classic-gcc/source/microbit-samples-combined.hex